As our boat-building lifestyle gets back to more of a boat-cruising lifestyle, this seems like a good time to start a cruising blog. We’ve begun to take Kama Hele out more and put some hours on all the equipment we’ve been installing to get the boat cr…
Archive | Koloa RSS feed for this section
New Cruising Blog
As our boat-building lifestyle gets back to more of a boat-cruising lifestyle, this seems like a good time to start a cruising blog. We’ve begun to take the boat out more and put some hours on all the equipment we’ve been installing to get the boat cru…
Putting things back together.
Next couple of weeks after the haulout were spent cleaning and putting everything back together inside the boat. The forepeak deck had to be rebuilt, with a bigger hatch to access the bow thruster hydraulic equipment:
Boxed in some ballast:
…
Putting things back together.
Next couple of weeks after the haulout were spent cleaning and putting everything back together inside the boat. The forepeak deck had to be rebuilt, with a bigger hatch to access the bow thruster hydraulic equipment:Boxed in some trip ballast:Went wit…
The Haul-out
So its been a little over two years since our last haulout.
No real surprises coming out of the water. We lost a little paint around the anodes (we are slightly over-protected with zincs), and the prop had quite a bit of calcified growth, and a nice co…
The Haul-out
So its been a little over two years since our last haulout.No real surprises coming out of the water. We lost a little paint around the anodes (we are slightly over-protected with zincs), and the prop had quite a bit of calcified growth, and a nice col…
Hooking up the hydraulics
Kind of light on the pictures, but just prior to hauling out we got most of the hydraulic plumbing in place up to the forward bulkhead where the bow thruster is going. This included three more lines from engine room to bow (supply, return, and case dra…
Hooking up the hydraulics
Kind of light on the pictures, but just prior to hauling out we got most of the hydraulic plumbing in place up to the forward bulkhead where the bow thruster is going. This included three more lines from engine room to bow (supply, return, and case dra…
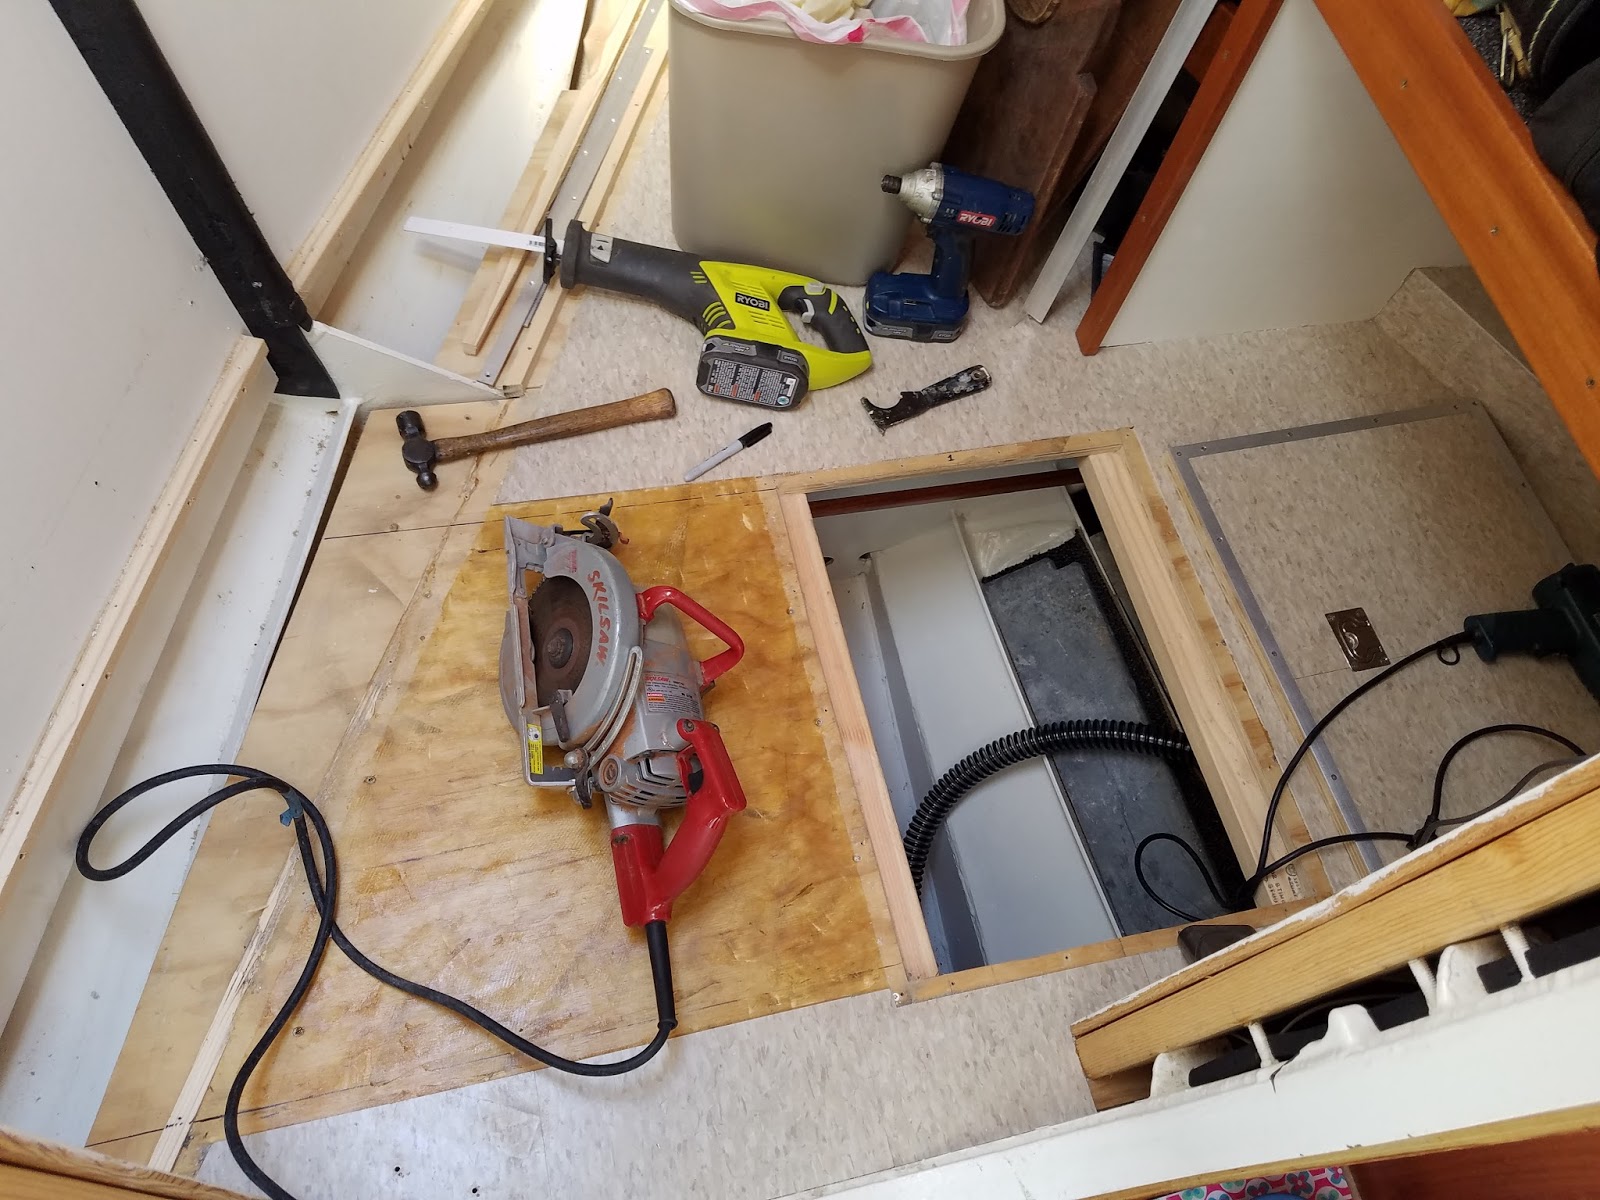
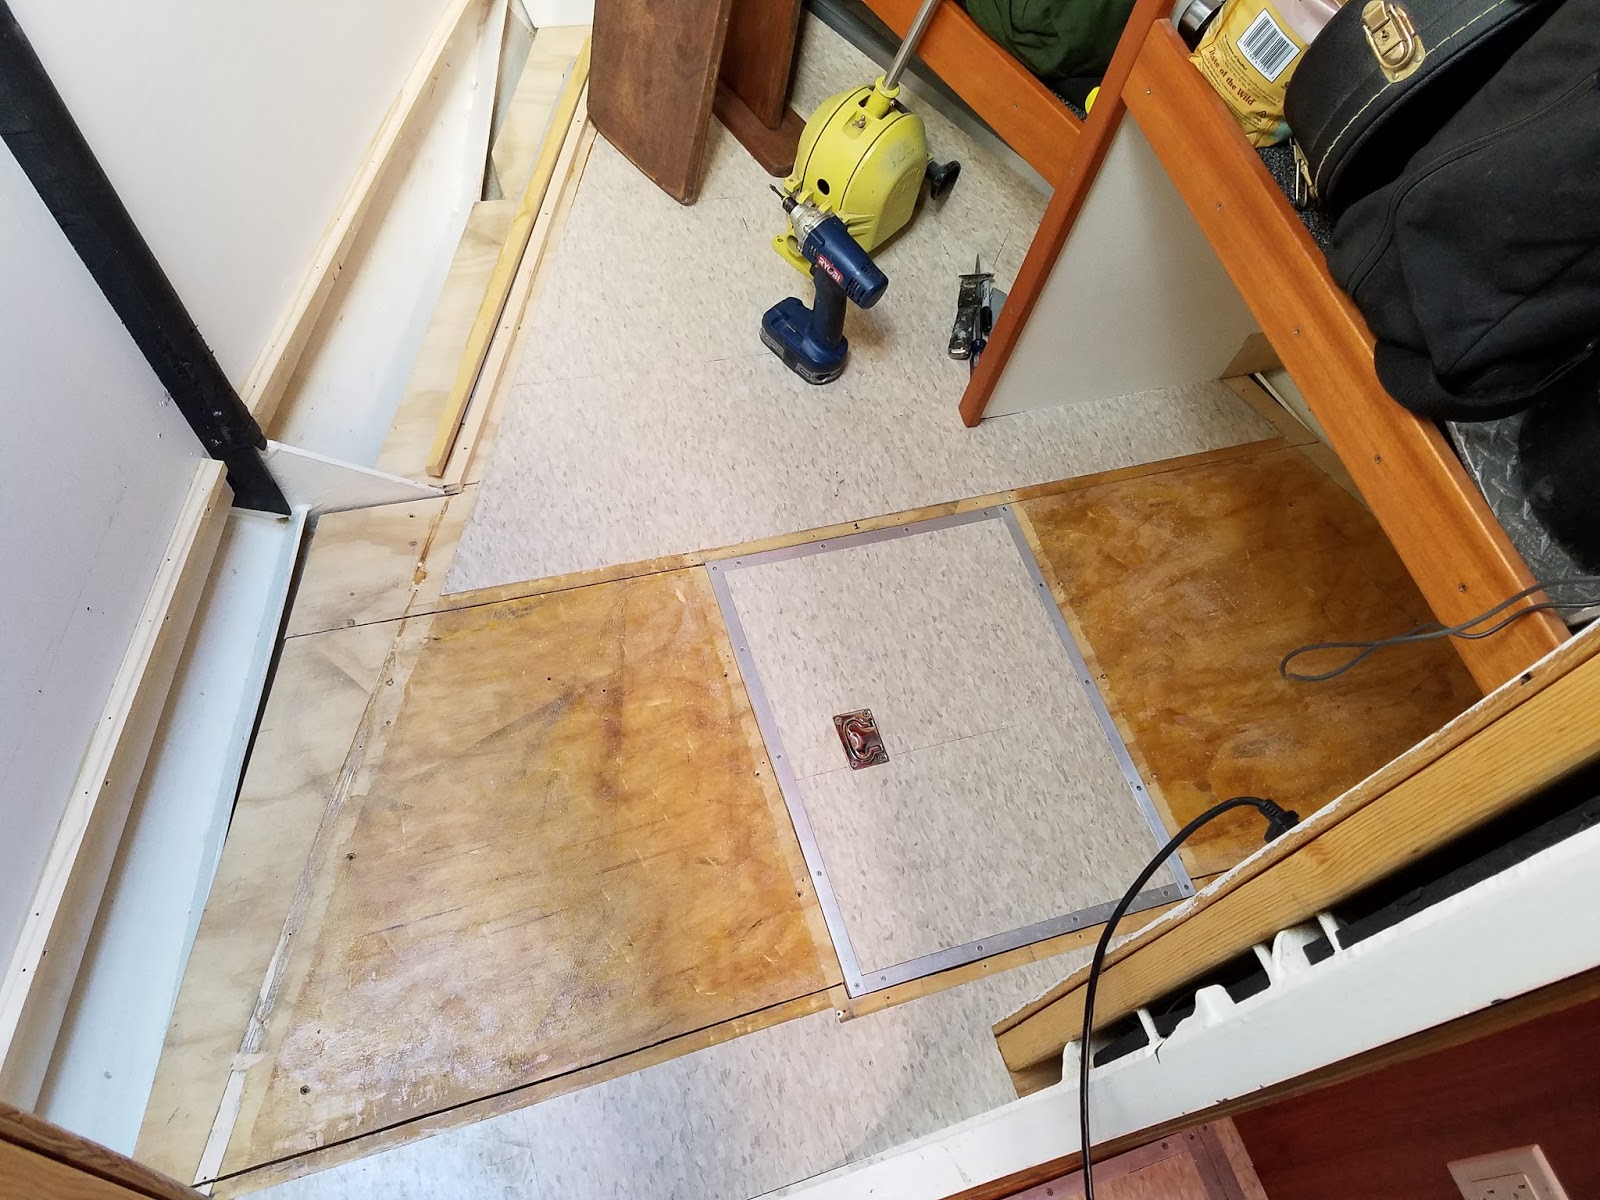
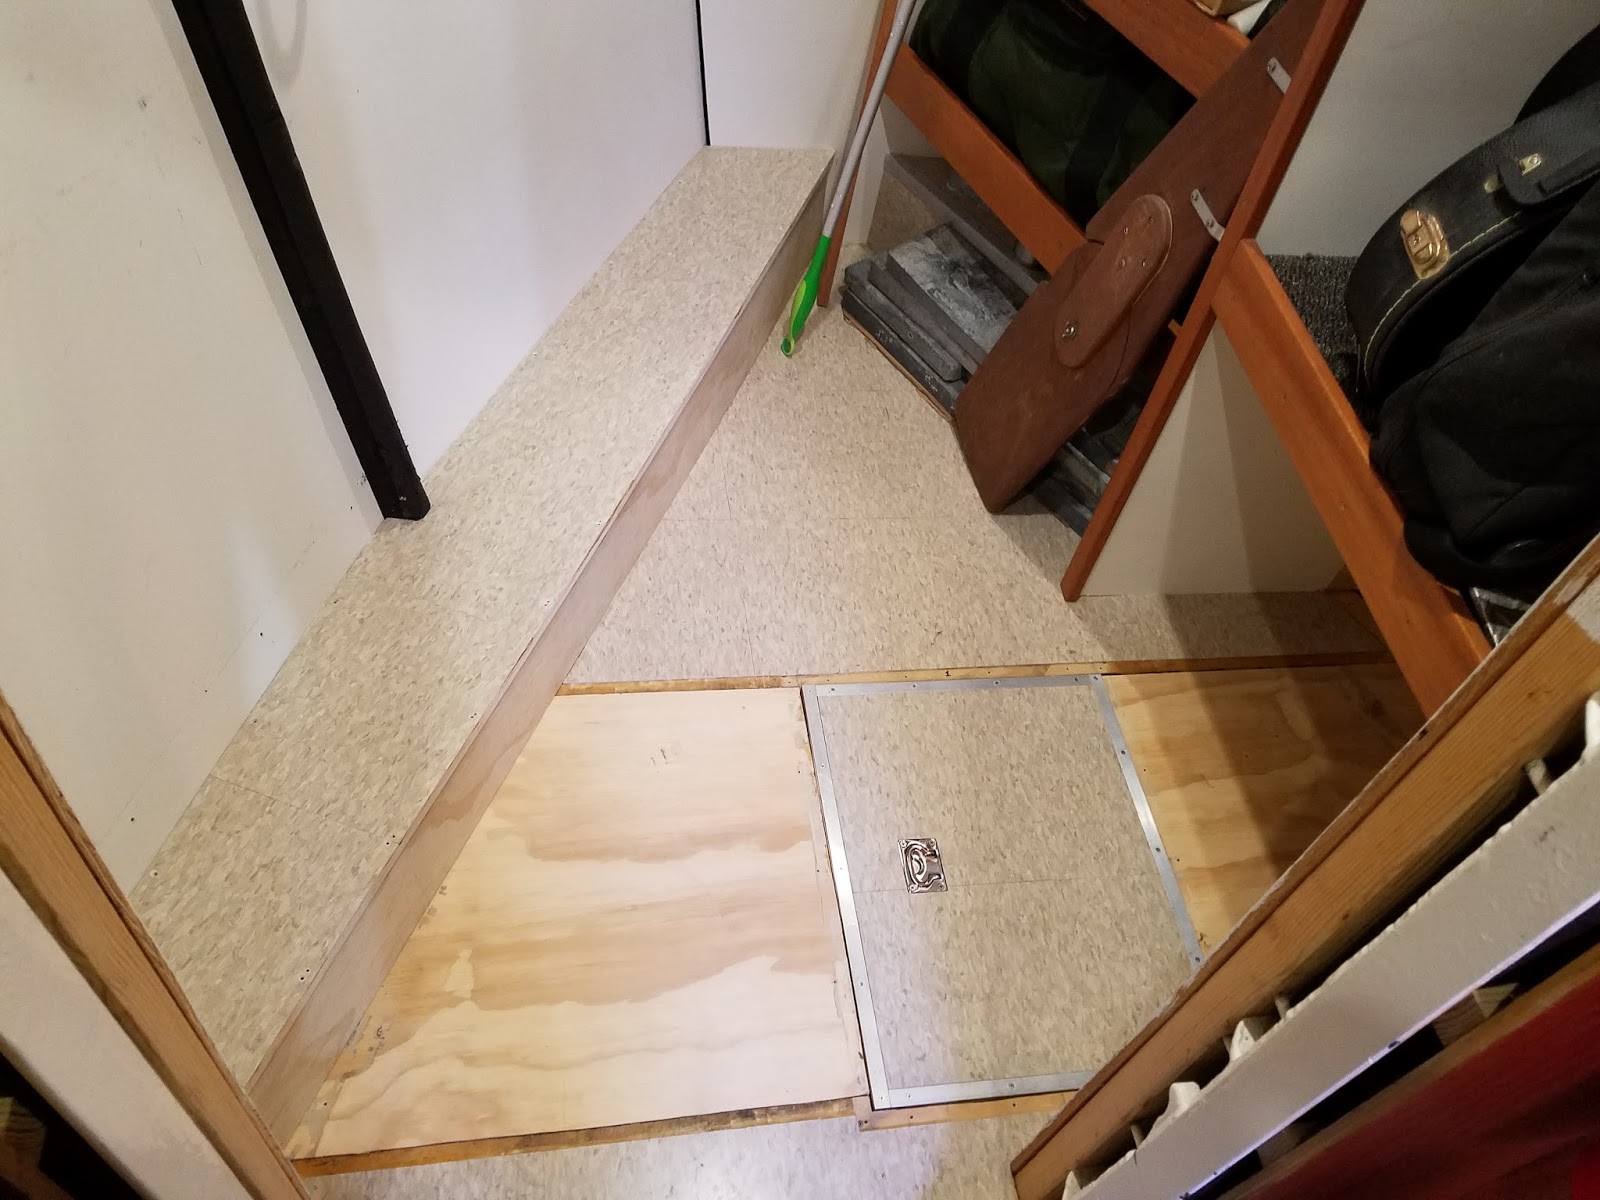
More prep for new hydraulics and bow thruster install
Here are some pics of another weekend of work getting ready
for the installation of the new bow thruster and hydraulic system upgrade. In
order to get access to weld in the 12” pipe that will become the bow thruster
tube, I had to remove some interior interferences in the forepeak. This mostly
involved cutting back the decking in a way that would allow access for the
work, but could be temporarily re-assembled so we don’t have to live with a big
hole in the deck for the next few weeks.

In the engine room, I installed all the hydraulic
distribution blocks and other components, including adjustable pressure and flow
controls coming off the main pressure output of the pump for the anchor winch.
This is so that the high 3000 psi pressure and 20+ gpm flow from the pump (as it
is set up for the bow thruster) doesn’t overwhelm the winch motor or any other
less demanding loads we attach to the system.
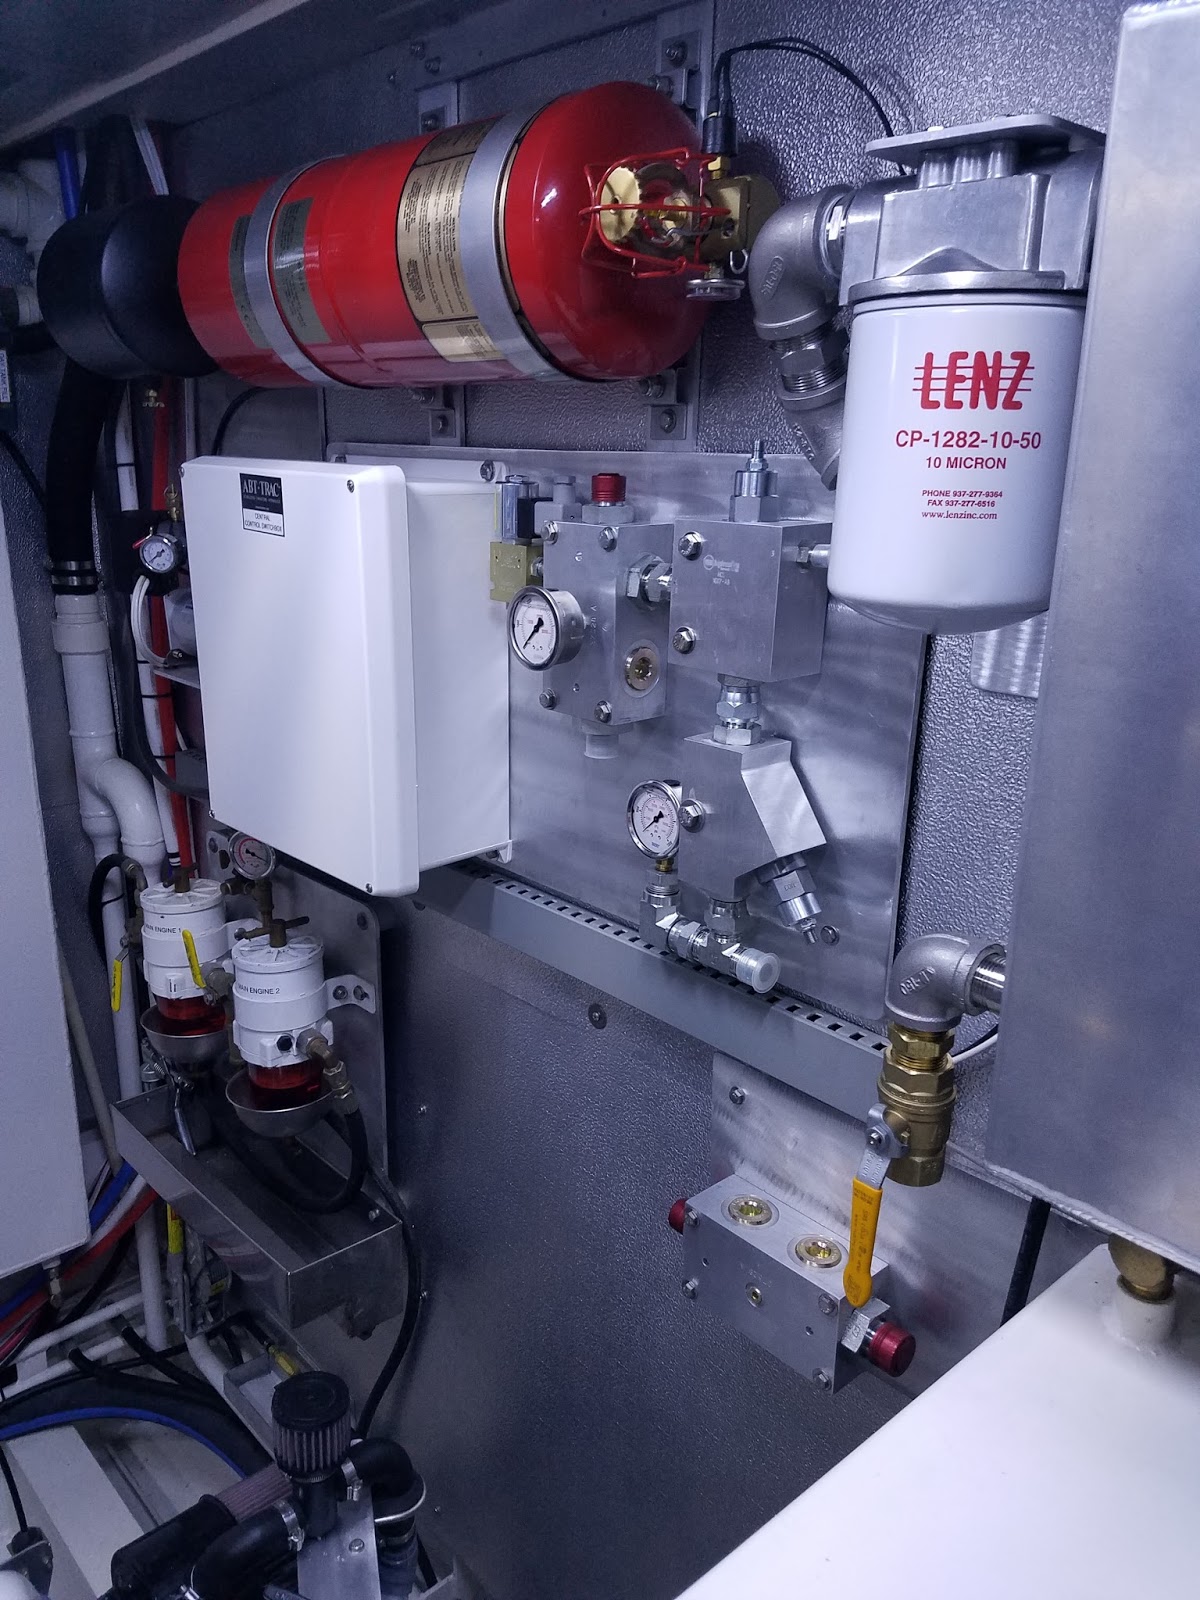
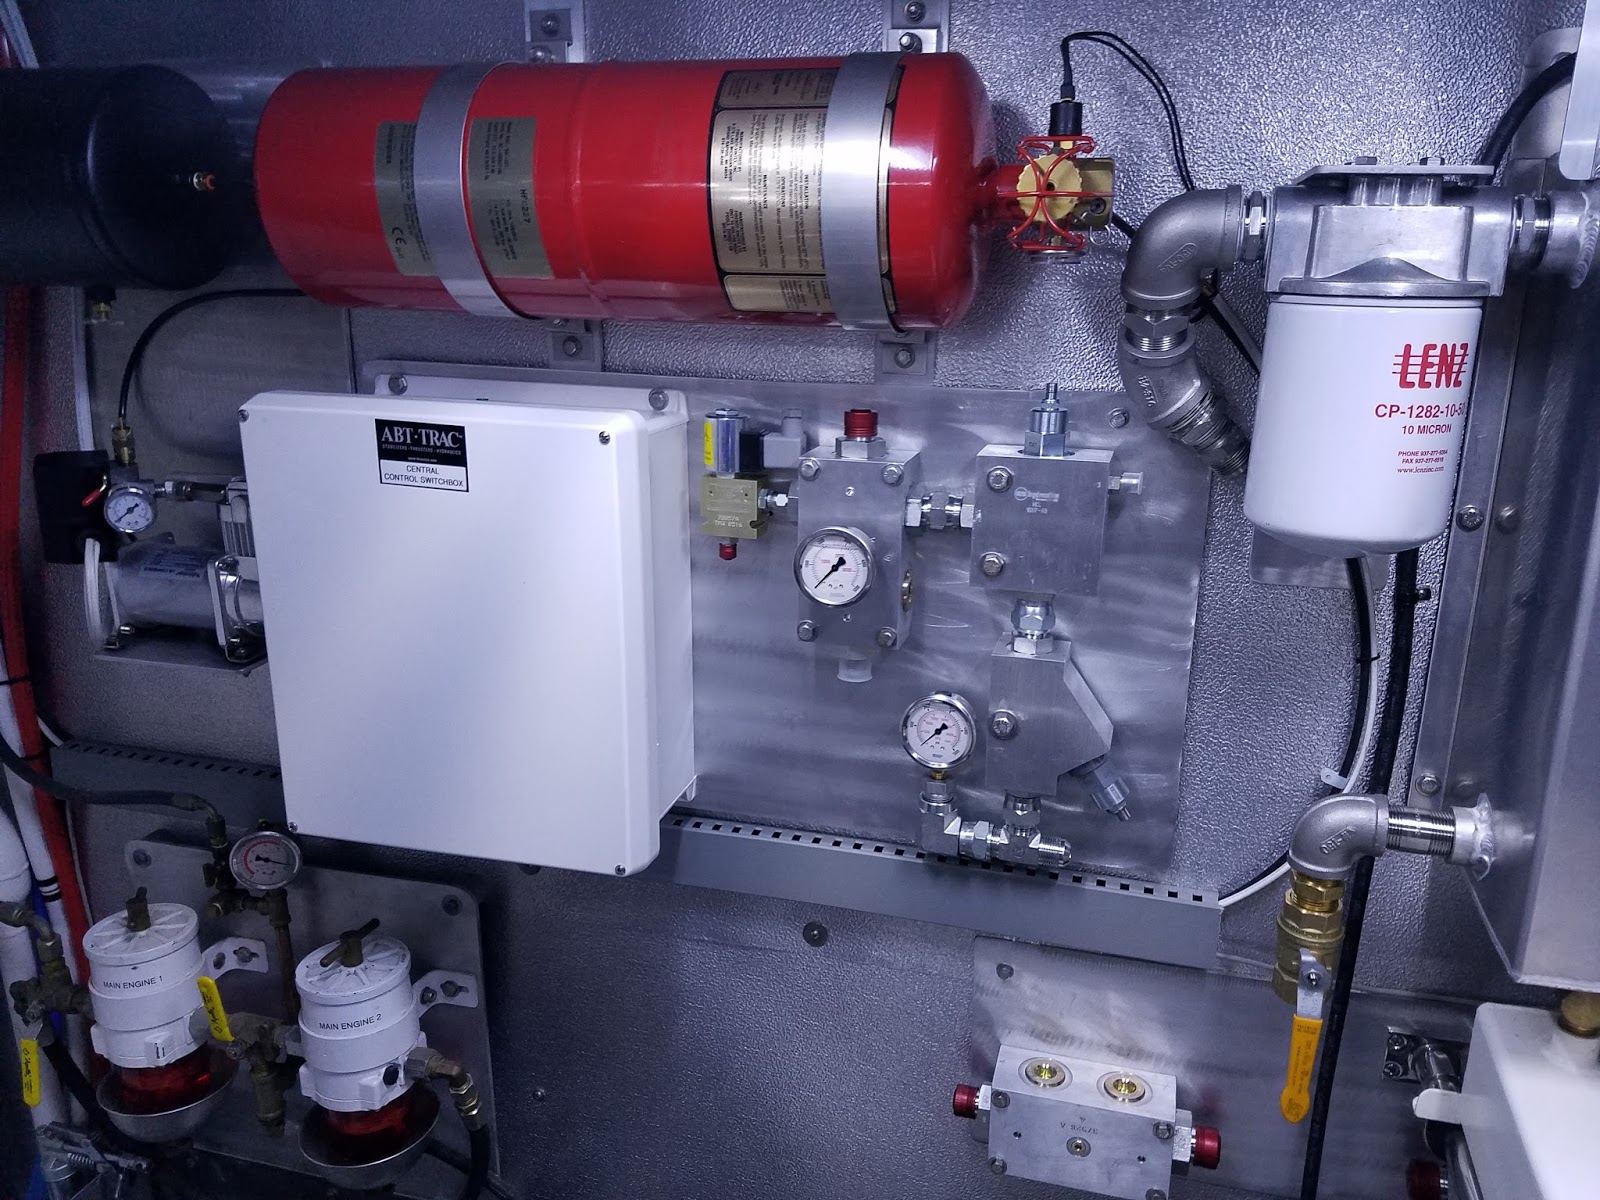
The system of distribution and return blocks make for a neat
arrangement with minimum extra fittings, and lots of extra ports for future
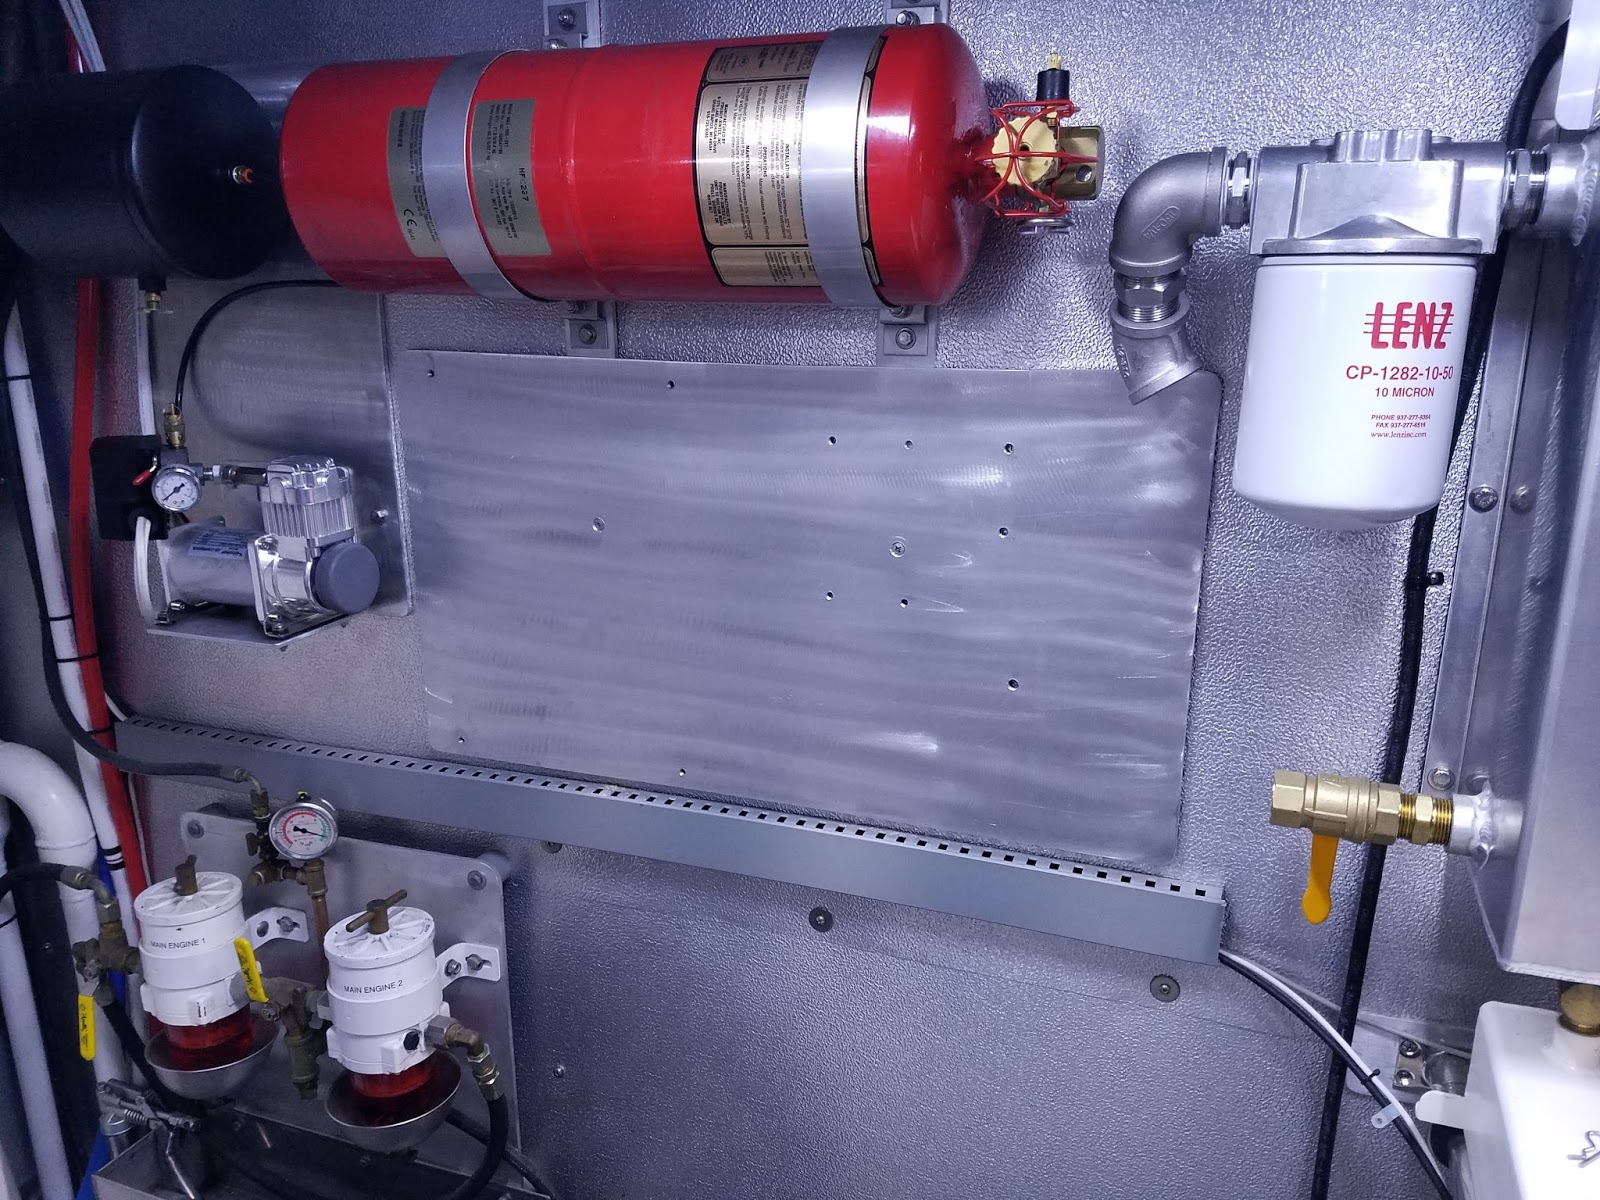
expansion. In order to fit everything on the bulkhead (including the big cabinet housing the electronics for the hydraulic system), I had to move the fixed fire suppression bottle
over a few inches. All the mounted components and distribution blocks are attached to
the bulkhead with bolts that are threaded into the aluminum mounting plate from
the front, so they are easy to remove if needed.
arrangement with minimum extra fittings, and lots of extra ports for future
expansion. In order to fit everything on the bulkhead (including the big cabinet housing the electronics for the hydraulic system), I had to move the fixed fire suppression bottle
over a few inches. All the mounted components and distribution blocks are attached to
the bulkhead with bolts that are threaded into the aluminum mounting plate from
the front, so they are easy to remove if needed.
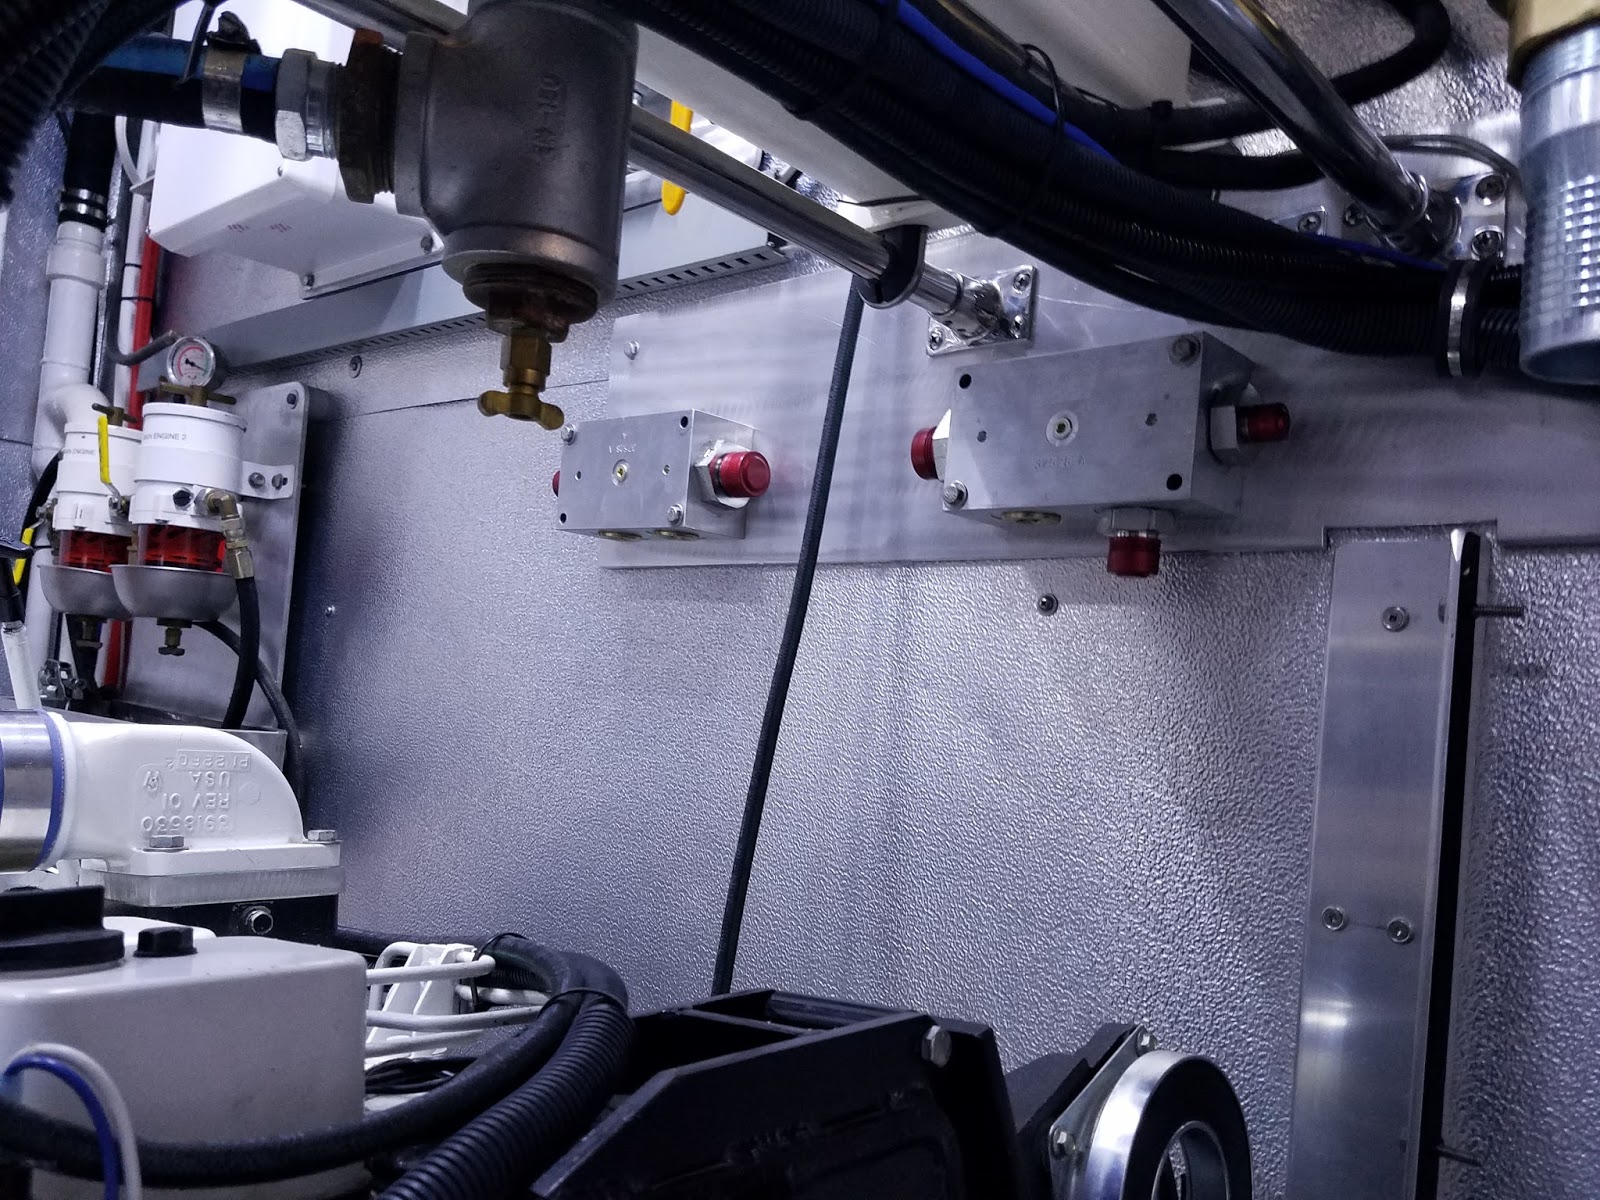
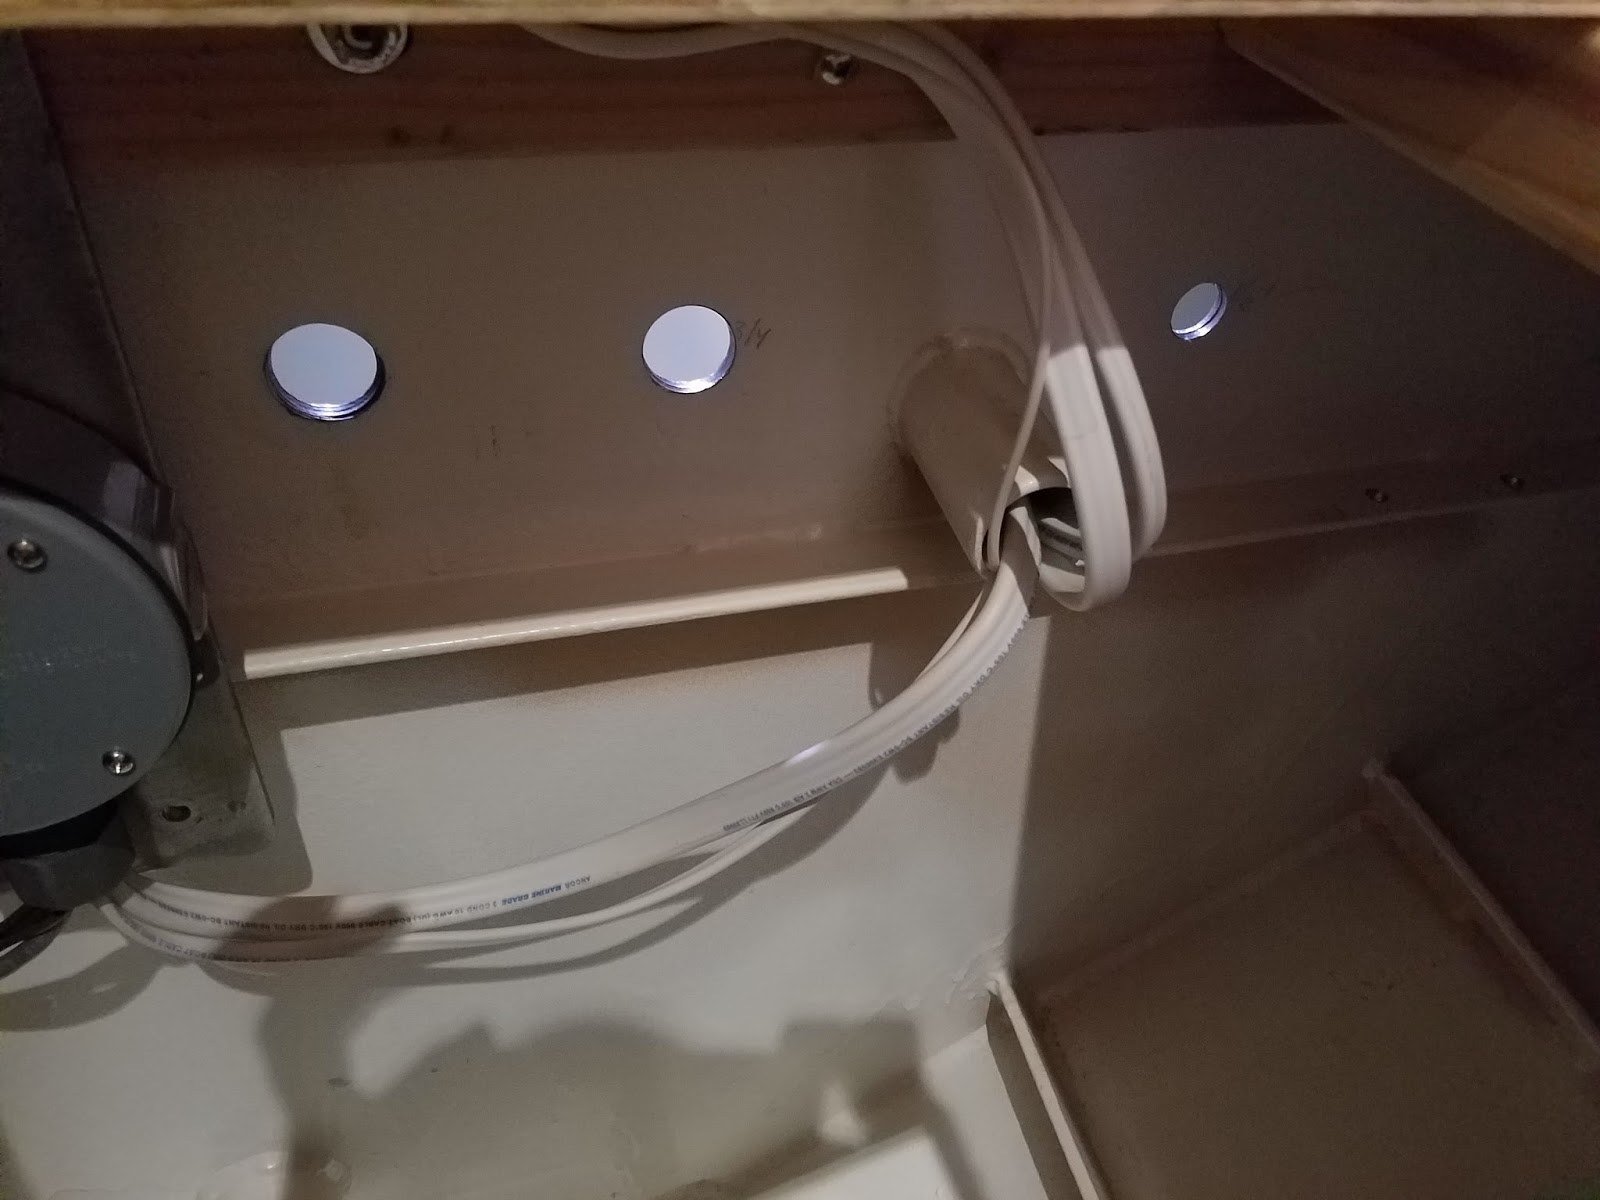
A few additional hose runs from the engine room to the bow
are needed for pressure, return, and case drain lines. New holes are now
drilled through the bulkheads and once painted, I will be installing JIC
hydraulic bulkhead fittings at these transitions.
are needed for pressure, return, and case drain lines. New holes are now
drilled through the bulkheads and once painted, I will be installing JIC
hydraulic bulkhead fittings at these transitions.

With all the primary pieces installed, I will be measuring
(at least twice) and making up the hoses that connect everything
together. Cleanliness is critical with hydraulic stuff, so I am doing my best to
keep everything clean and capped during the install.
(at least twice) and making up the hoses that connect everything
together. Cleanliness is critical with hydraulic stuff, so I am doing my best to
keep everything clean and capped during the install.
The only hose that does not use a crimped fitting is the
supply line from the tank to the pump inlet. This is a monster 2.5” id hose. If
they even make crimping dies in this size, we definitely do not have one in our
shop. Instead, it will be secured will dual T-clamps at each end. Since this is
a low pressure line, that should be more than enough to stay leak free. I was a
little worried about fitting up this hose because in this size, the necessary
wire reinforced construction to keep from collapsing under suction makes it
very inflexible. Fortunately, with a straight flange adapter coming off the bottom
of the pump it made a nice easy single curve down and straight back up to meet
the tank fitting. Both the supply and case drain fittings at the bottom of the
tank have ball valves that will be handy for servicing the system without draining
the tank. I like to remove the handles on any valves that are normally open and
would cause damage to equipment if accidentally closed when running, so I’m doing
that here as well.
More prep for new hydraulics and bow thruster install
Here are some pics of another weekend of work getting ready for the installation of the new bow thruster and hydraulic system upgrade. In order to get access to weld in the 12” pipe that will become the bow thruster tube, I had to remove some interior interferences in the forepeak. This mostly involved cutting back the decking in a way that would allow access for the work, but could be temporarily re-assembled so we don’t have to live with a big hole in the deck for the next few weeks.
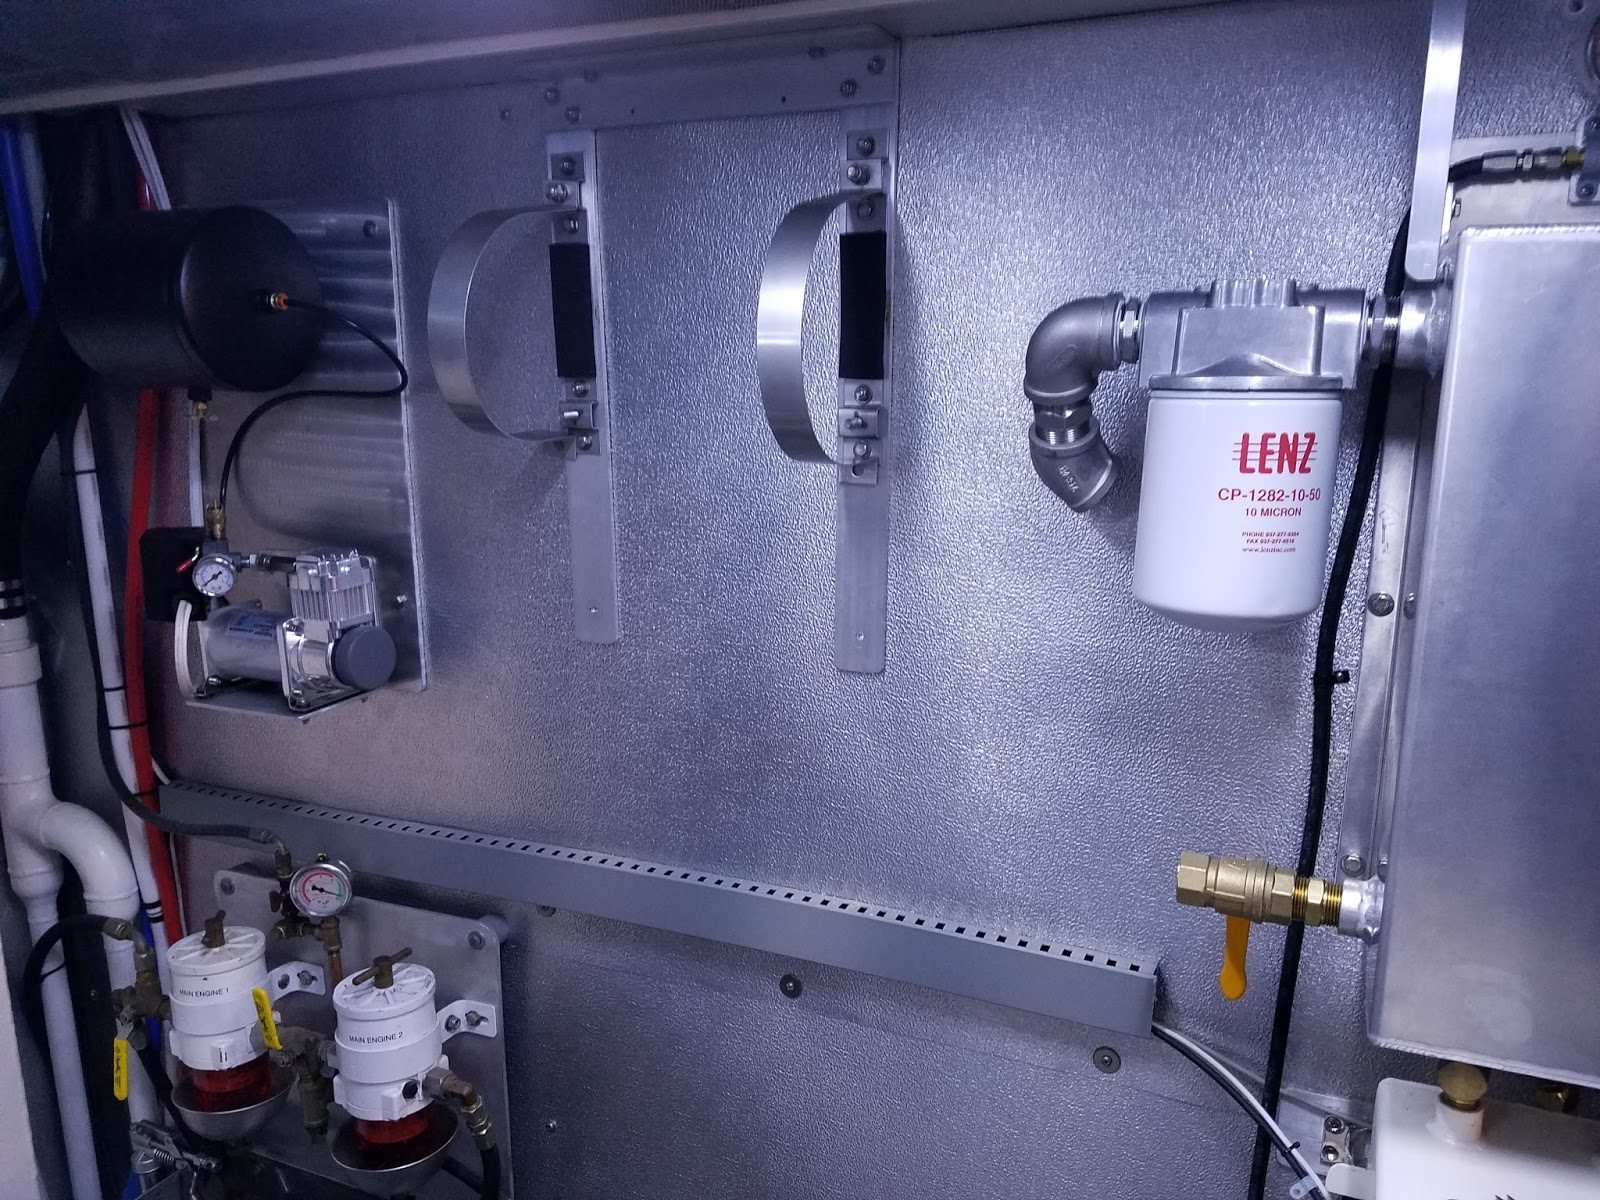
In the engine room, I installed all the hydraulic distribution blocks and other components, including adjustable pressure and flow controls coming off the main pressure output of the pump for the anchor winch. This is so that the high 3000 psi pressure and 20+ gpm flow from the pump (as it is set up for the bow thruster) doesn’t overwhelm the winch motor or any other less demanding loads we attach to the system.
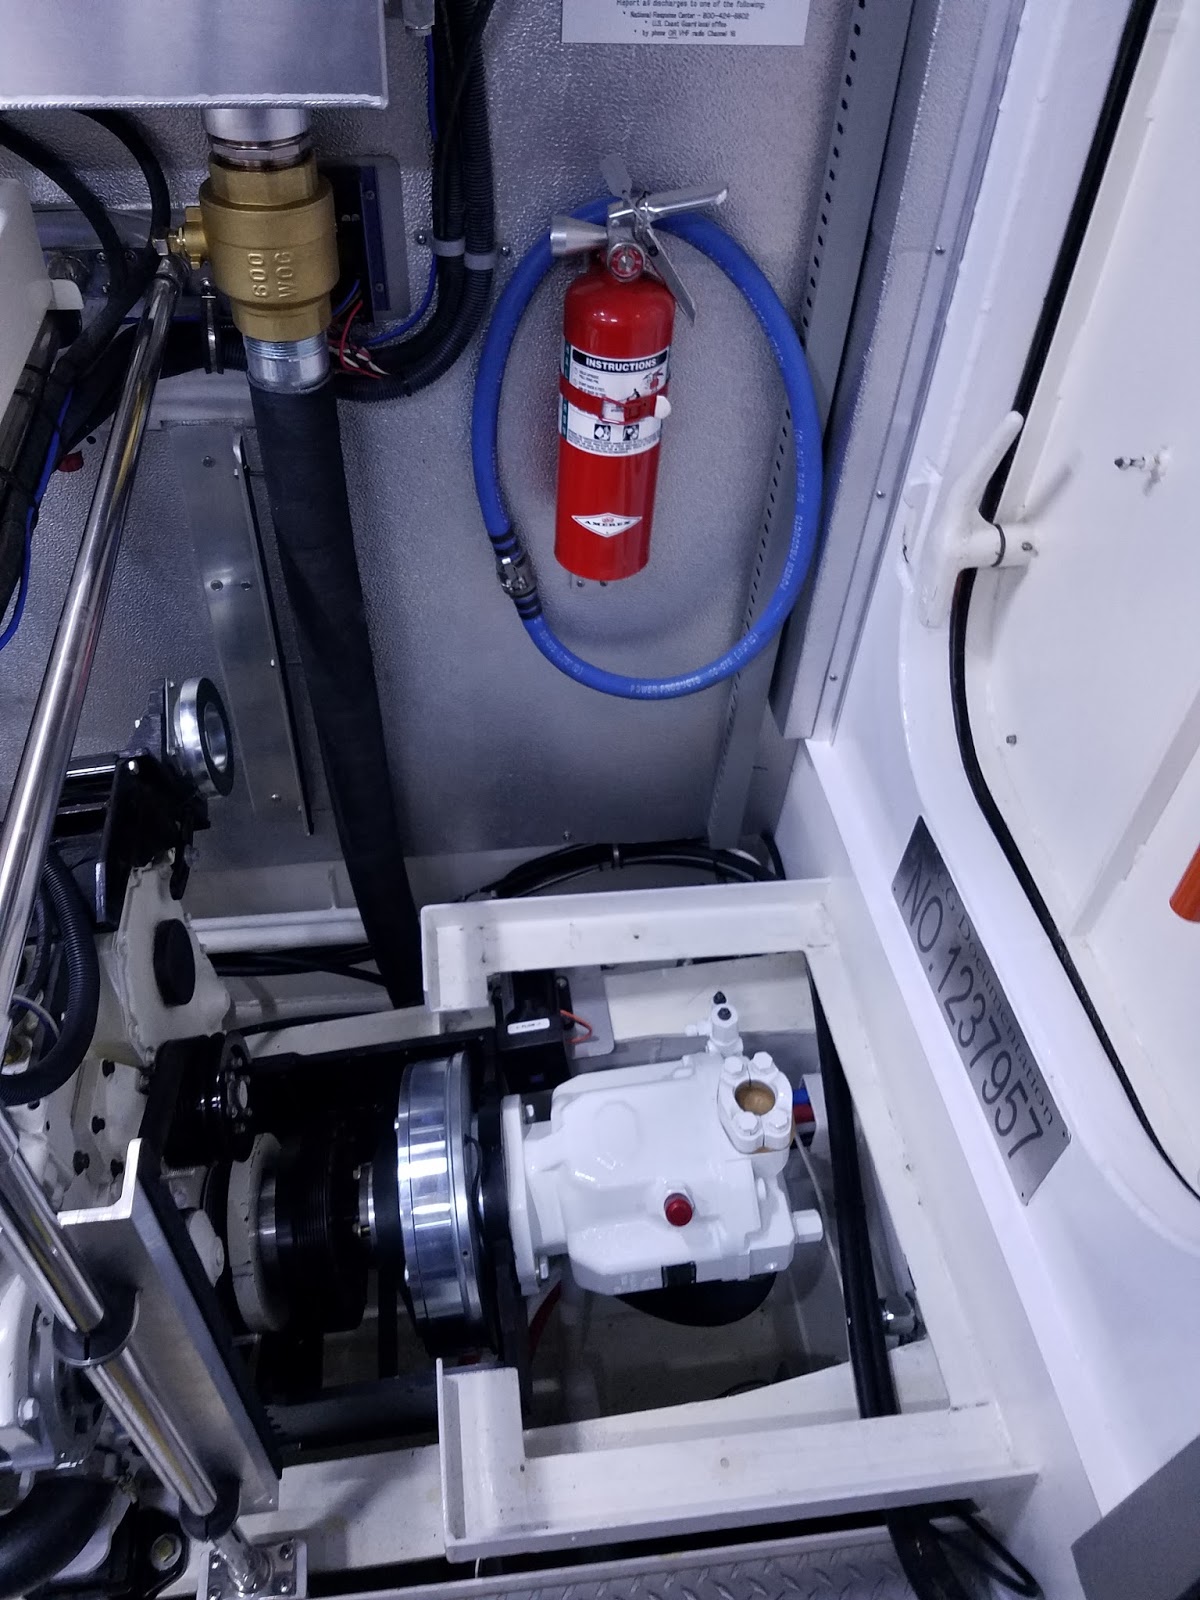
The system of distribution and return blocks make for a neat arrangement with minimum extra fittings, and lots of extra ports for future expansion. In order to fit everything on the bulkhead (including the big cabinet housing the electronics for the hydraulic system), I had to move the fixed fire suppression bottle over a few inches. All the mounted components and distribution blocks are attached to the bulkhead with bolts that are threaded into the aluminum mounting plate from the front, so they are easy to remove if needed.
A few additional hose runs from the engine room to the bow are needed for pressure, return, and case drain lines. New holes are now drilled through the bulkheads and once painted, I will be installing JIC hydraulic bulkhead fittings at these transitions.
With all the primary pieces installed, I will be measuring (at least twice) and making up the hoses that connect everything together. Cleanliness is critical with hydraulic stuff, so I am doing my best to keep everything clean and capped during the install.
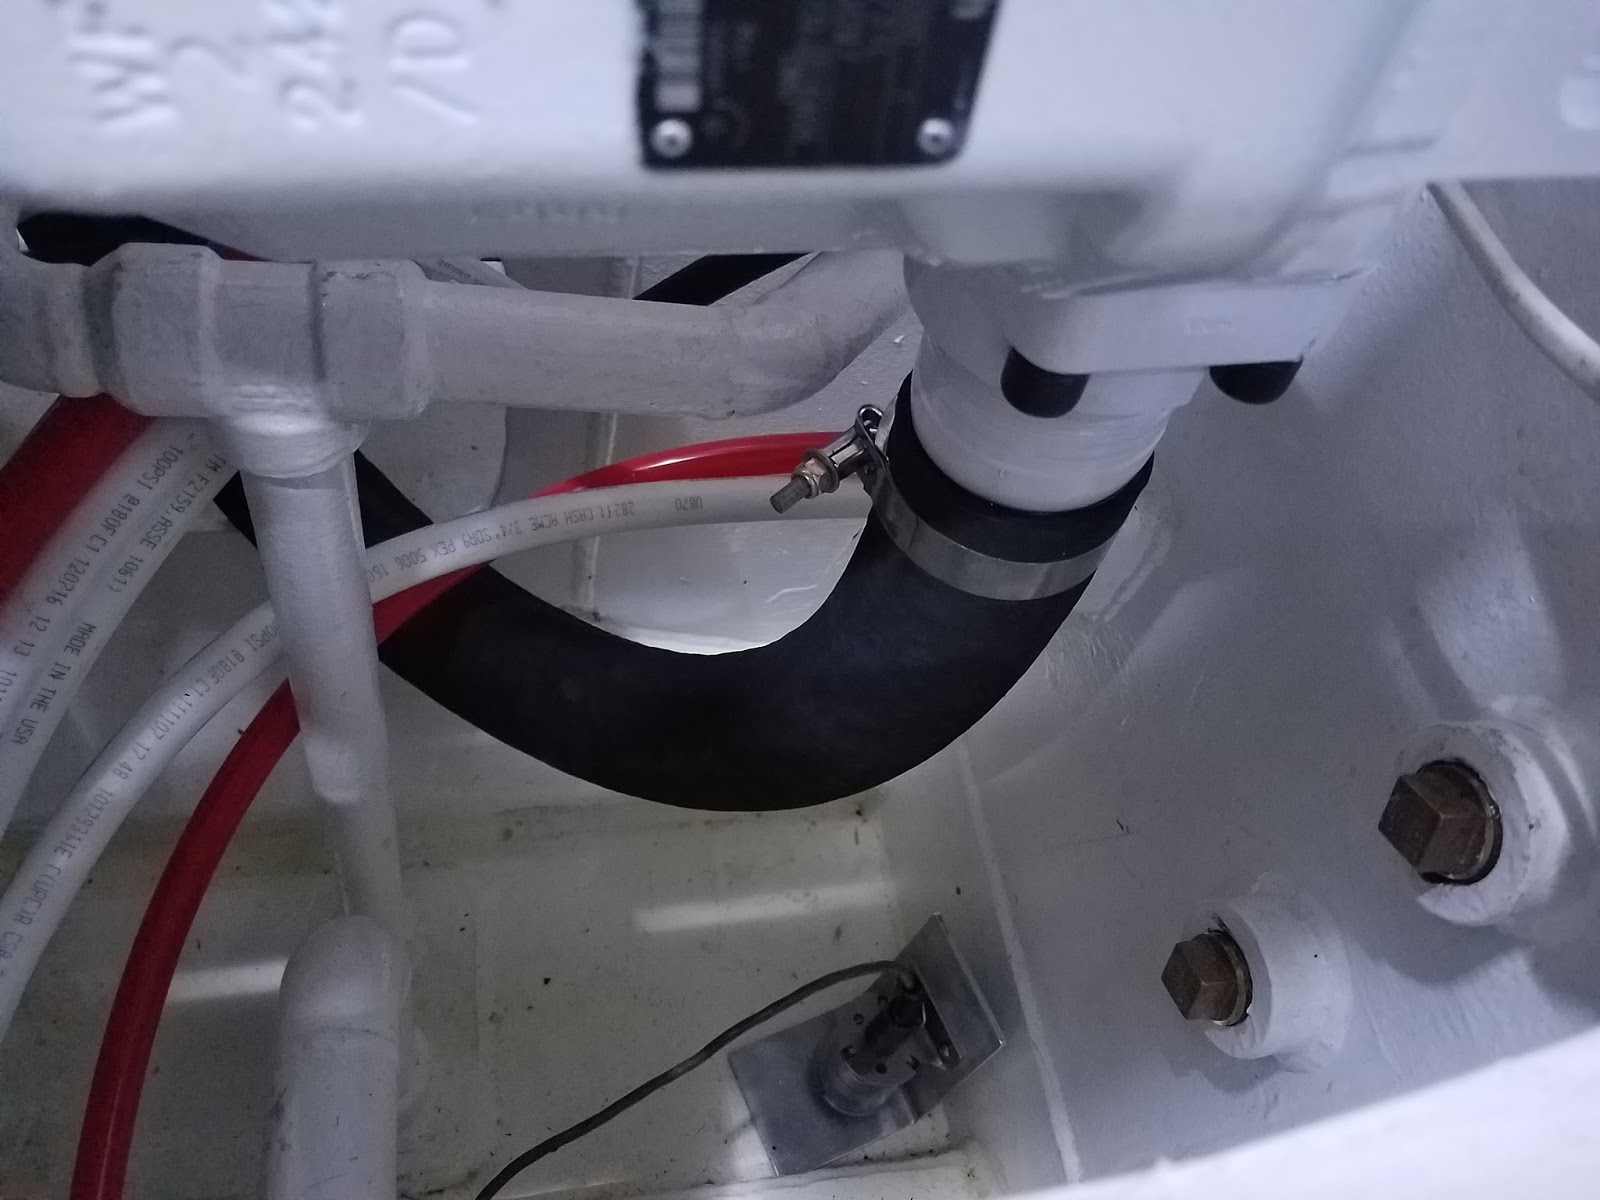
The only hose that does not use a crimped fitting is the supply line from the tank to the pump inlet. This is a monster 2.5” id hose. If they even make crimping dies in this size, we definitely do not have one in our shop. Instead, it will be secured will dual T-clamps at each end. Since this is a low pressure line, that should be more than enough to stay leak free. I was a little worried about fitting up this hose because in this size, the necessary wire reinforced construction to keep from collapsing under suction makes it very inflexible. Fortunately, with a straight flange adapter coming off the bottom of the pump it made a nice easy single curve down and straight back up to meet the tank fitting. Both the supply and case drain fittings at the bottom of the tank have ball valves that will be handy for servicing the system without draining the tank. I like to remove the handles on any valves that are normally open and would cause damage to equipment if accidentally closed when running, so I’m doing that here as well.